This article is mostly system-agnostic and the steps will be identical on Windows and on Linux – after all, that’s one of the benefits of using Eclipse. The screenshots were created on Windows 10, but on Linux the only differences will be in the appearance of various windows or the file system hierarchy.
Be advised, that using Eclipse to develop a project based on distortos is not obligatory. Neither is following the exact steps described in this article. Eclipse is quite popular, cross-platform and full of useful features, but any of these traits can be an advantage or a disadvantage – depending on your preferences. Using this particular IDE in the particular way described in this guide is just one of many possible combinations – not necessarily the best one, most likely not the worst one either, but known to work and tested in many projects. Experienced developers with their own habits may consider this article to be just a brief explanation of the development process used in distortos-based project.
Workspace creation
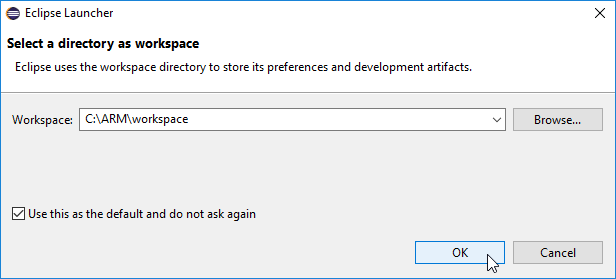
If you are running Eclipse for the first time, you will first see a prompt to select the location of your workspace. As usual, try something short and simple, without spaces or special characters – like C:\ARM\workspace for Windows or ~/ARM/workspace for Linux. Select the Use this as the default and do not ask again checkbox and click OK to close the prompt and create your workspace.
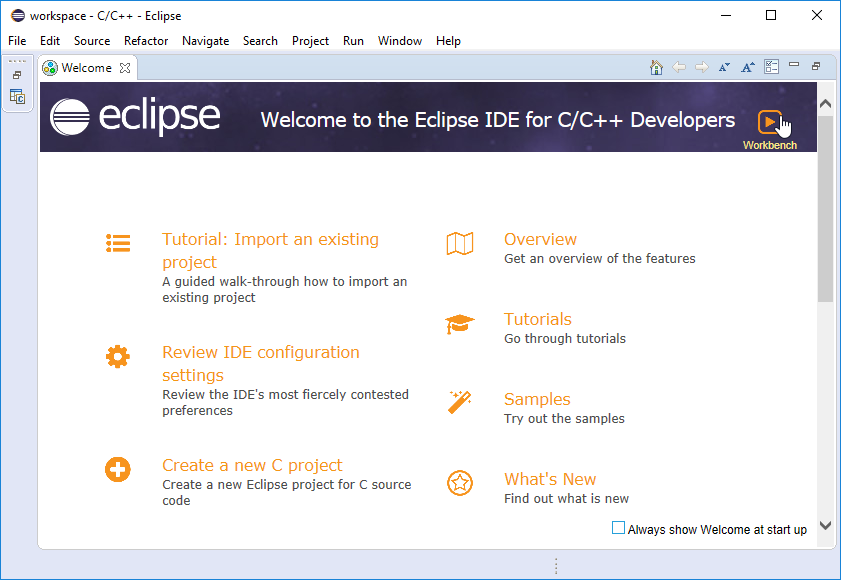
If this is the first time you use this workspace, Eclipse will start with a Welcome tab opened. Just deselect the Always show Welcome at startup checkbox at the bottom right and click on Workbench icon at the top right.
Creating C++ project
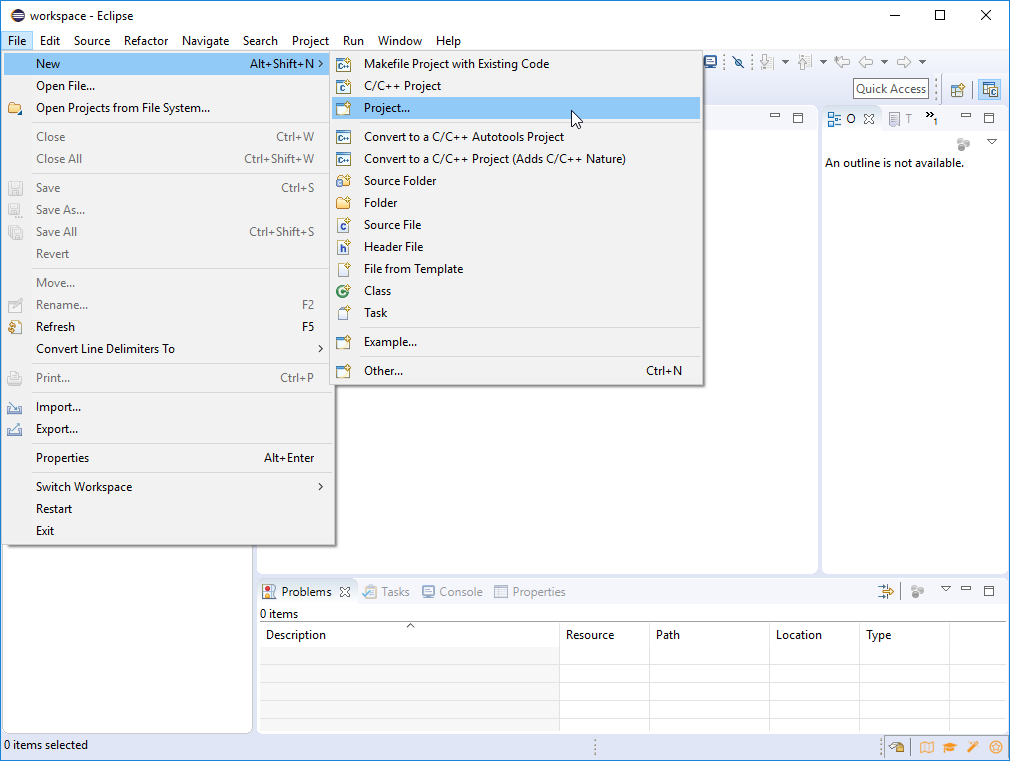
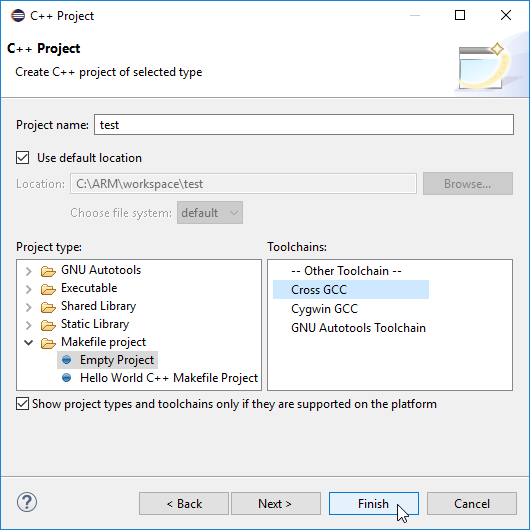
The very first thing you should do is create a new C++ project (be advised – do not create a managed C/C++ Project). To do that, click File > New > Project…. In the dialog that appears select C++ Project from the C/C++ group (do not select C/C++ Project, as this will create a managed build project) and click Next. In the next step give your project a short and simple name (no spaces, no special characters) – for example test. Expand Makefile project group in the Project type frame, select Empty Project and then select Cross GCC in the Toolchains frame. As there’s nothing more to configure here, click Finish to close the dialog and create the project.

Importing project template
Now let’s dump some sources to this empty project! Download the most recent distortosTemplateSubfolder from the Downloads section – make sure to select right format for your system: .7z for Windows or .tar.xz for Linux. Extract the archive anywhere you want and switch back to Eclipse.
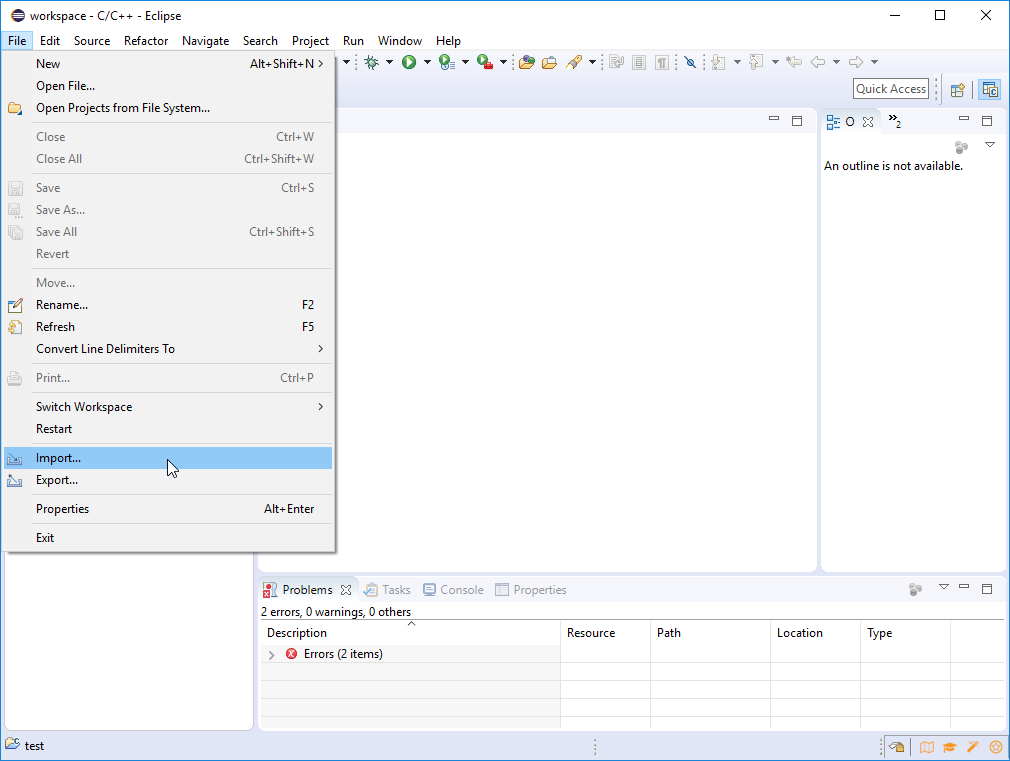
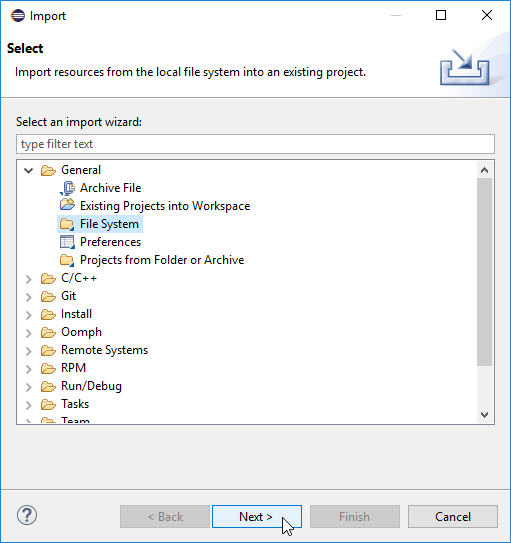
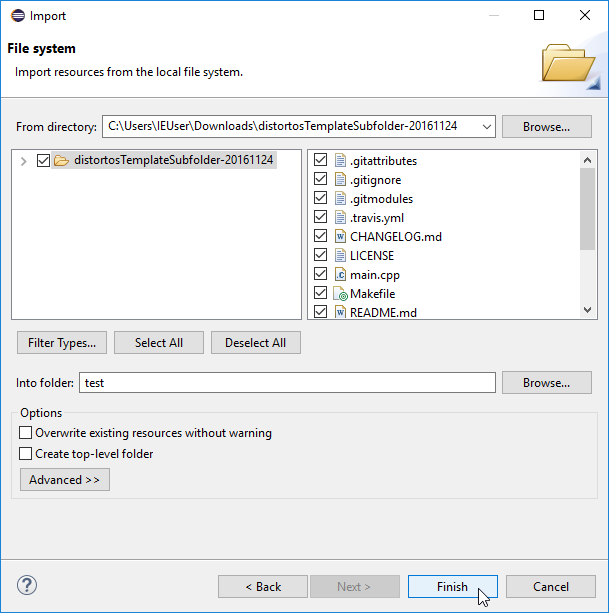
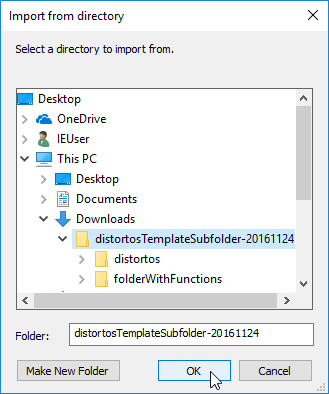
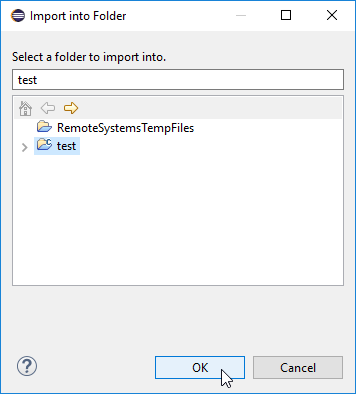
Make sure the project you created is selected in the Project Explorer tab on the left and click Import… from File menu. Expand General group, select File System and click Next. Click Browse… next to From directory field, navigate to the extracted distortosTemplateSubfolder-YYYYMMDD folder, select it and click OK. In the left field just below From directory label select the checkbox next to the folder with extracted sources – this way all of its contents will be imported into your project. Again – make sure that top level folder of your project is selected in the Into folder field below – if it’s not, then fix it with the help of Browse… button to the right of this field. Leave checkboxes in the Options field deselected and click Finish.
distortos configuration
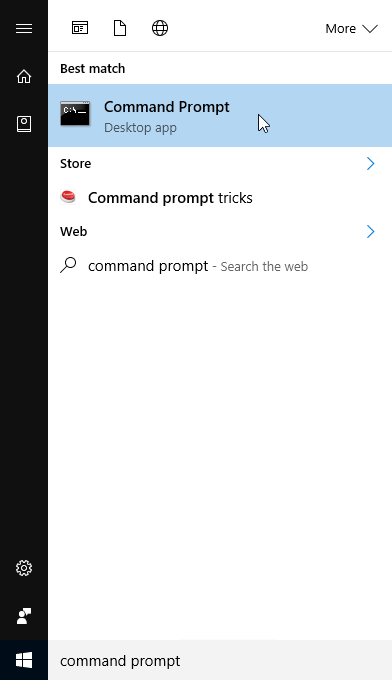
This project still cannot be compiled, as distortos is not configured yet. First thing is to create our own distortosConfiguration.mk file with project configuration. These configuration files have to be created and edited via your system’s terminal – “graphical” tools from kconfig-frontends won’t work directly in Eclipse. If you are on Windows, open its Start menu, type command prompt and open the application with that name. Important note for Windows users – you should NOT use MSYS2 shell for any of the following steps, use Windows’ native Command Prompt only! If you are on Linux, run your favourite graphical terminal emulator (Terminal in GNOME, konsole in KDE, …) or switch to virtual terminal with Ctrl + Alt + Fx.
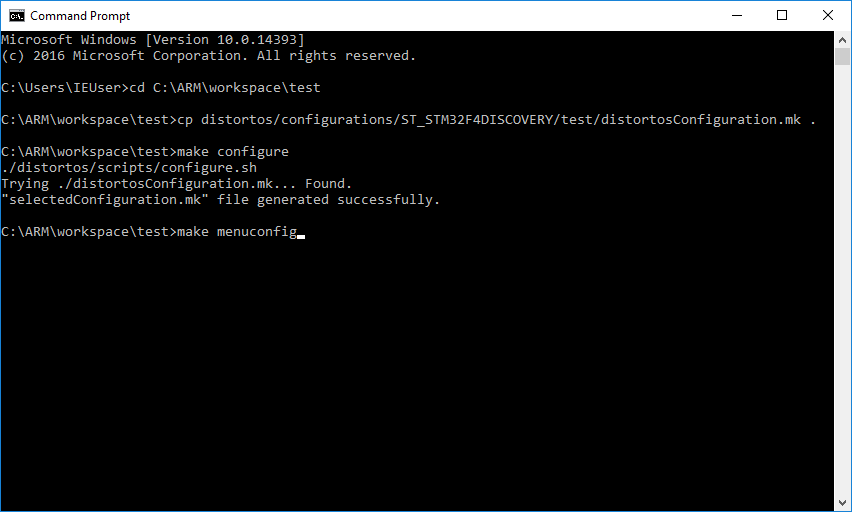
Navigate to our project’s folder with either cd C:\ARM\workspace\test on Windows or cd ~/ARM/workspace/test on Linux. Instead of creating the configuration file from scratch, you can copy an existing configuration which is the most similar to your board and use it as a starting point – just type something like cp distortos/configurations/ST_STM32F4DISCOVERY/test/distortosConfiguration.mk .. Select this newly copied configuration by issuing a make configure command (which is equivalent to make configure CONFIG_PATH=.). Now you can start the configuration tool by typing make menuconfig.
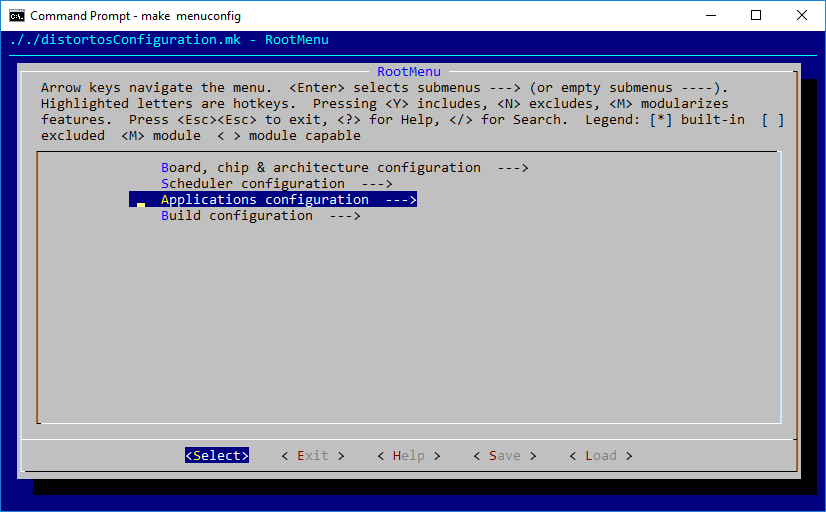
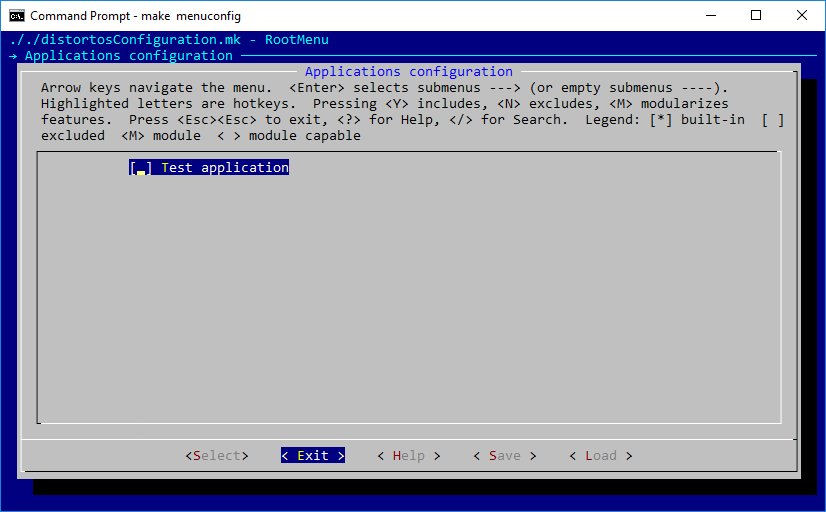
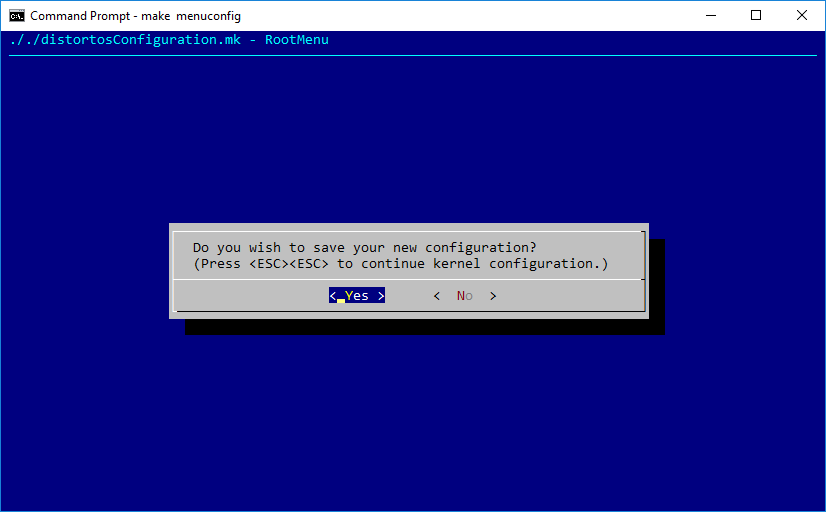
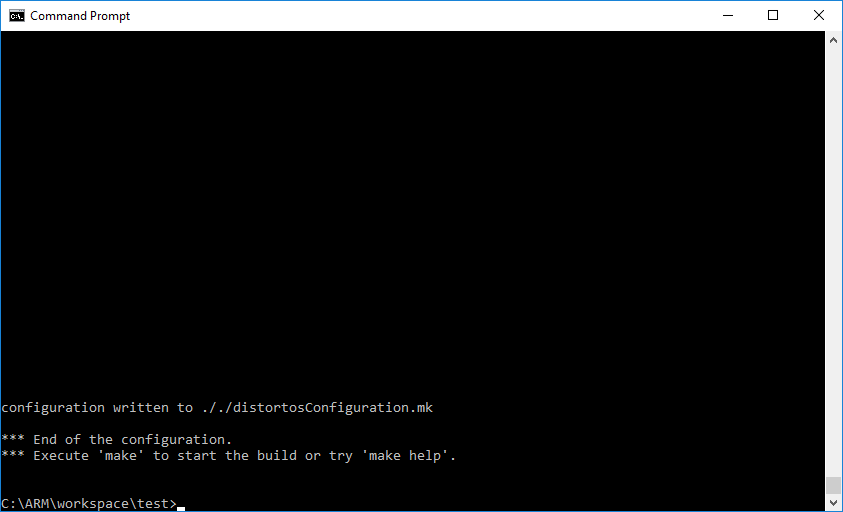
For a start you should go to Applications configuration and deselect Test application – we won’t be needing it. Change other options to suit your board or leave them as they are for now – you can change them whenever you need by starting the configuration tool again. When you’re done, just exit the configuration tool, saving the configuration when prompted.
Building the project
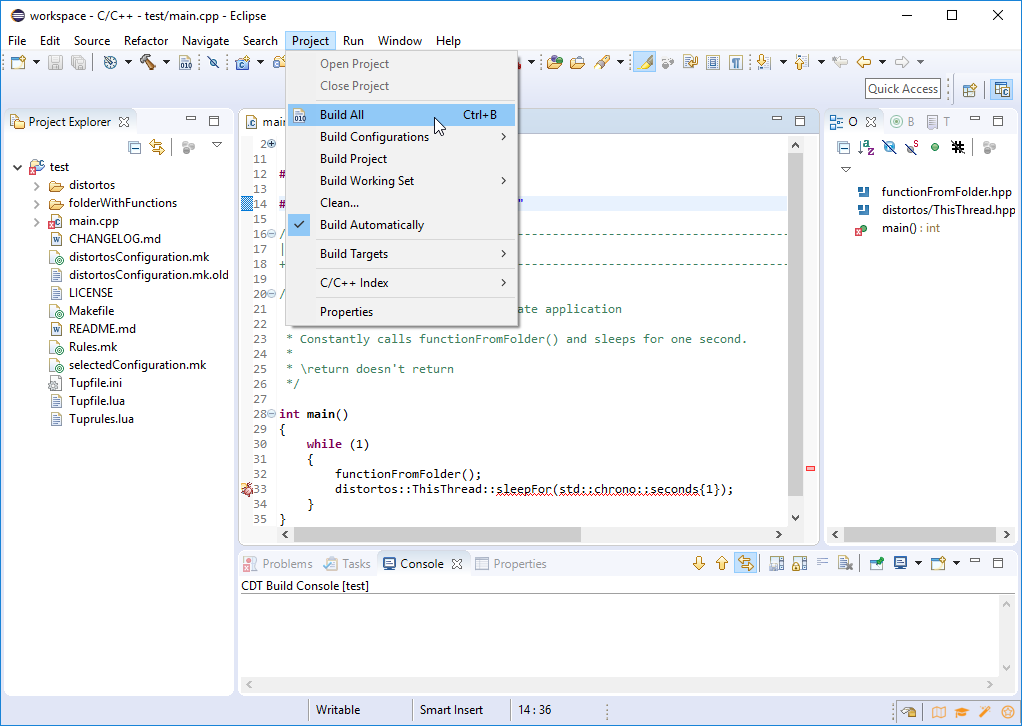
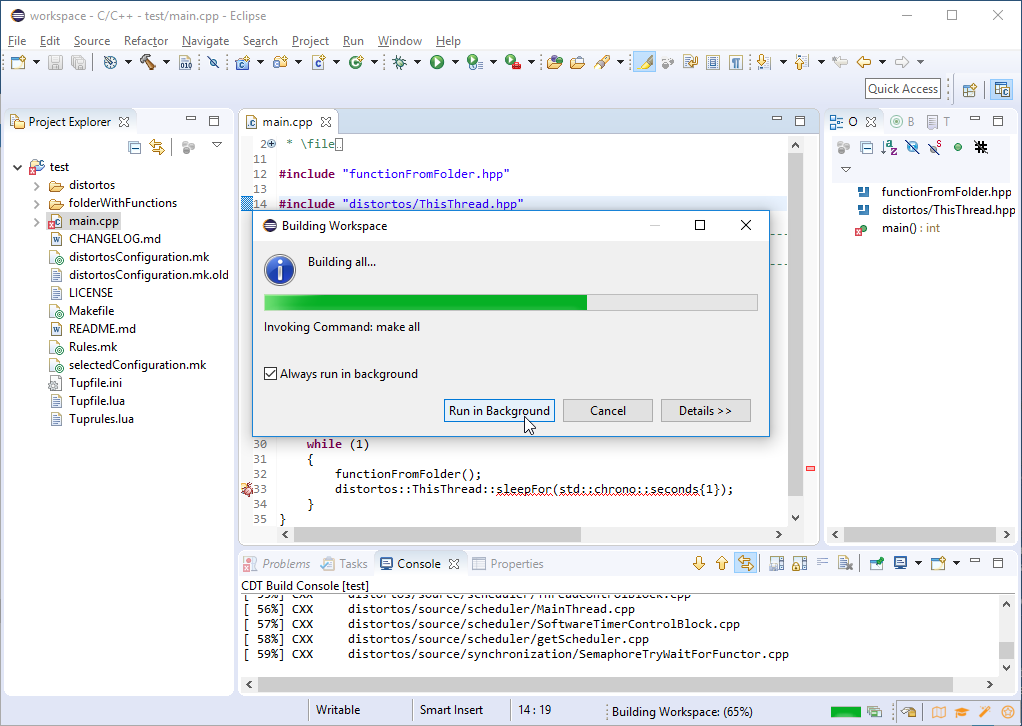
OK – back to Eclipse. The project can be compiled now – select Console tab at the bottom panel and click Project > Build All (or just press Ctrl + B). If you see a Building Workspace window you can select Always run in background checkbox and click Run in Background – there’s nothing interesting here anyway. After a short while your build should finish without any errors in the Console tab.

Project configuration
Parallel build and verbose output
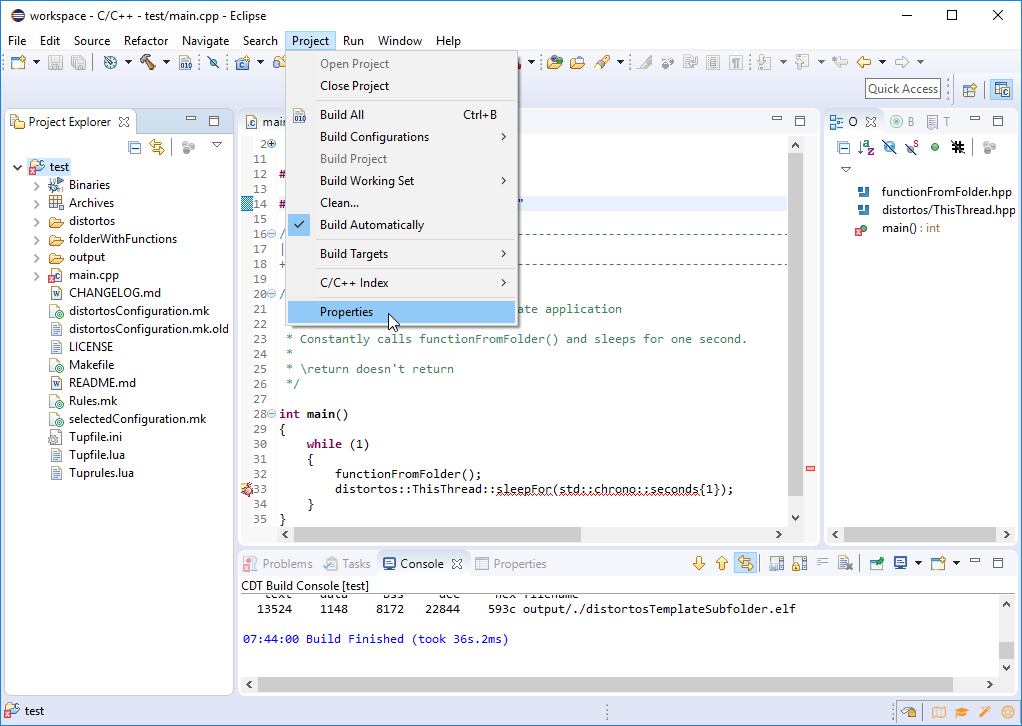
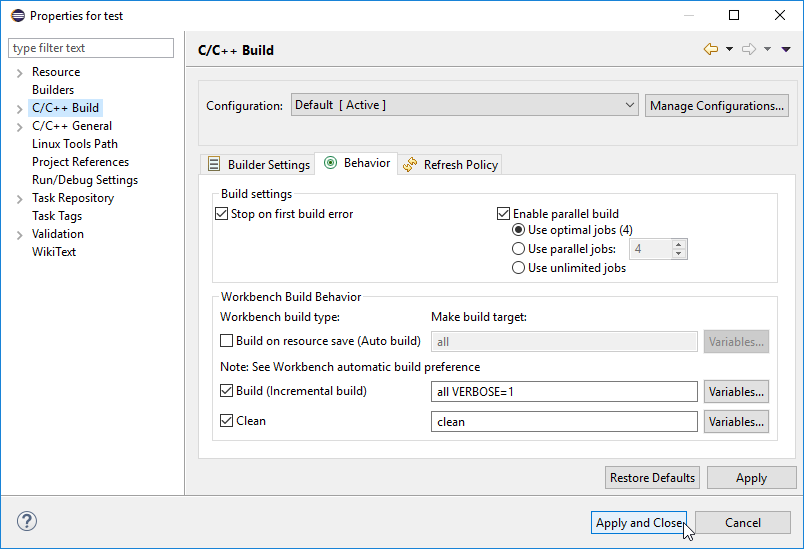
At this point the build is pretty slow and things like code completion or code navigation won’t work as expected… Go to Project > Properties and then click C/C++ Build and select Behavior tab. First thing to do is selecting Enable parallel build checkbox in the Build settings group, which will make the compilation significantly faster on a multicore PC (like the one which you most likely have). You can leave Use optimal jobs (…) selected, as this option will automatically use all available cores. You should also change the contents of Build (Incremental build) field to all VERBOSE=1, which will enable printing of full commands during compilation, allowing Eclipse to parse them for various preprocessor directives like -I with include folders or -D with macros. Close project properties by clicking Apply and Close (or OK in older versions of Eclipse).
Indexer configuration
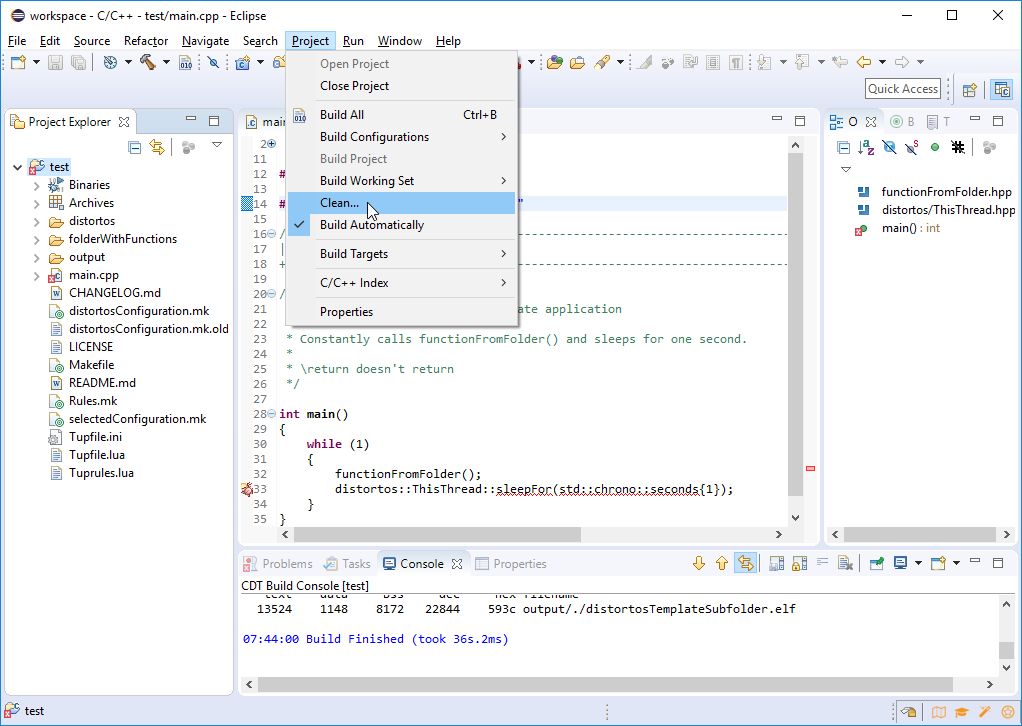
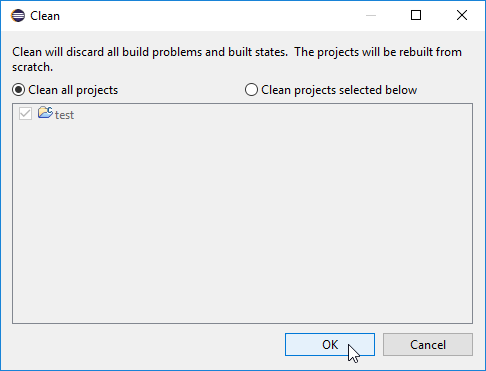
For the next step we also need to see the commands, so let’s rebuild the project. Select Clean from Project menu and click OK in the window which will appear. After this short operation finishes, build the project again (Project > Build All or Ctrl + B). If should be much faster this time (in here – ~10s vs. ~35s), but we are mostly interested in exact compilation flags.
Go to Console tab at the bottom panel and scroll it a little bit up, to see the compilation commands, which would be similar to arm-none-eabi-g++ -Wall -Wextra -Wshadow -std=gnu++11 -mcpu=cortex-m4 -mthumb -mfloat-abi=hard -mfpu=fpv4-sp-d16 -g -ggdb3 -O2 -fno-use-cxa-atexit -ffunction-sections -fdata-sections -fno-rtti -fno-exceptions -Ioutput/include -Idistortos/include -I./folderWithFunctions -MD -MP -c main.cpp -o output/./main.o . Select the part with all -std and -m flags ( -std=gnu++11 -mcpu=cortex-m4 -mthumb -mfloat-abi=hard -mfpu=fpv4-sp-d16 in the example and on the screenshot) and copy it to clipboard – either by right-clicking it and selecting Copy or by pressing Ctrl + C.

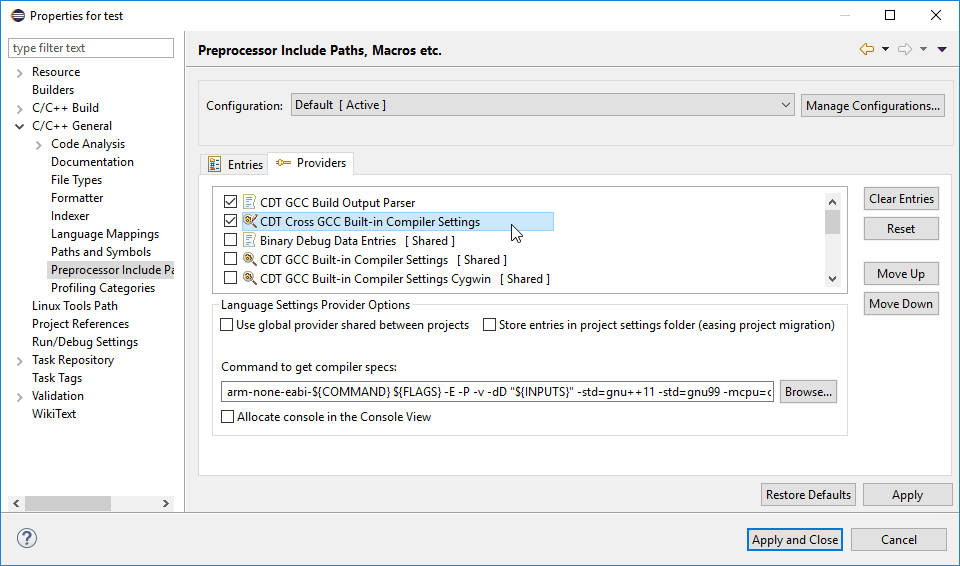
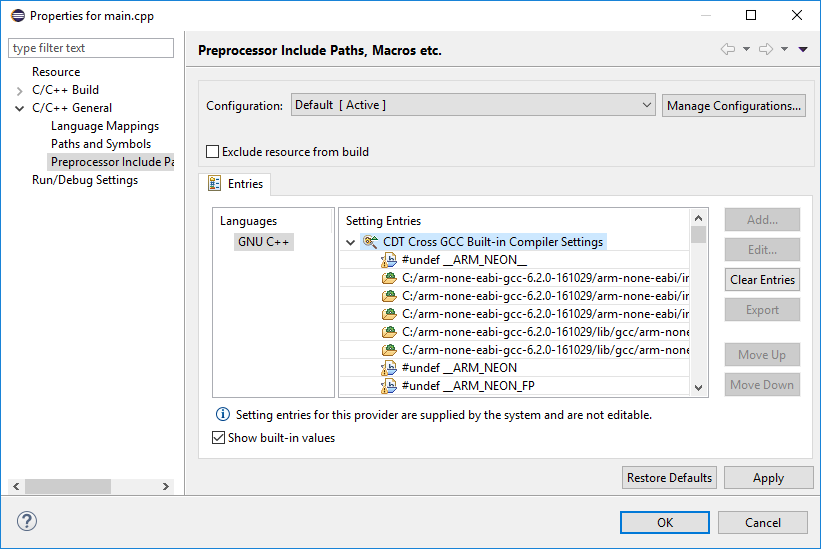
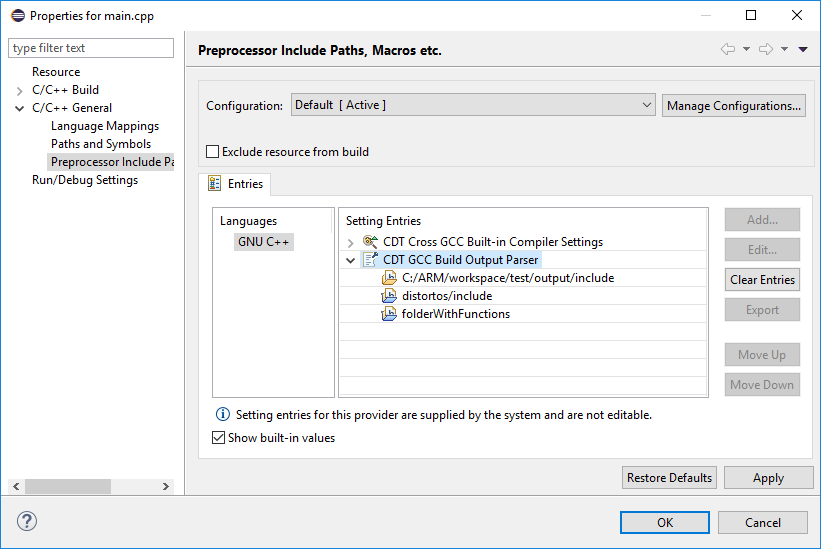
Open project properties again (Project > Properties), expand C/C++ General group, select Preprocessor Include Paths, Macros etc. and select Providers tab. Disable all providers and enable only CDT Cross GCC Built-in Compiler Settings and CDT GCC Build Output Parser.
Select CDT Cross GCC Built-in Compiler Settings on the list and place the cursor at the end of Command to get compiler specs field. Place a single space and paste the contents of your clipboard – right-click the field and select Paste or press Ctrl + V. From the text that you pasted you can remove all the flags which are not -std or -m. You should also add -std=gnu99 flag, as the contents of this field are used for both C and C++. Now go to the beginning of this field and replace ${COMMAND} with arm-none-eabi-${COMMAND}. Following with our example, complete contents of this field are now arm-none-eabi-${COMMAND} ${FLAGS} -E -P -v -dD "${INPUTS}" -std=gnu++11 -std=gnu99 -mcpu=cortex-m4 -mthumb -mfloat-abi=hard -mfpu=fpv4-sp-d16 (initial value was ${COMMAND} ${FLAGS} -E -P -v -dD "${INPUTS}").
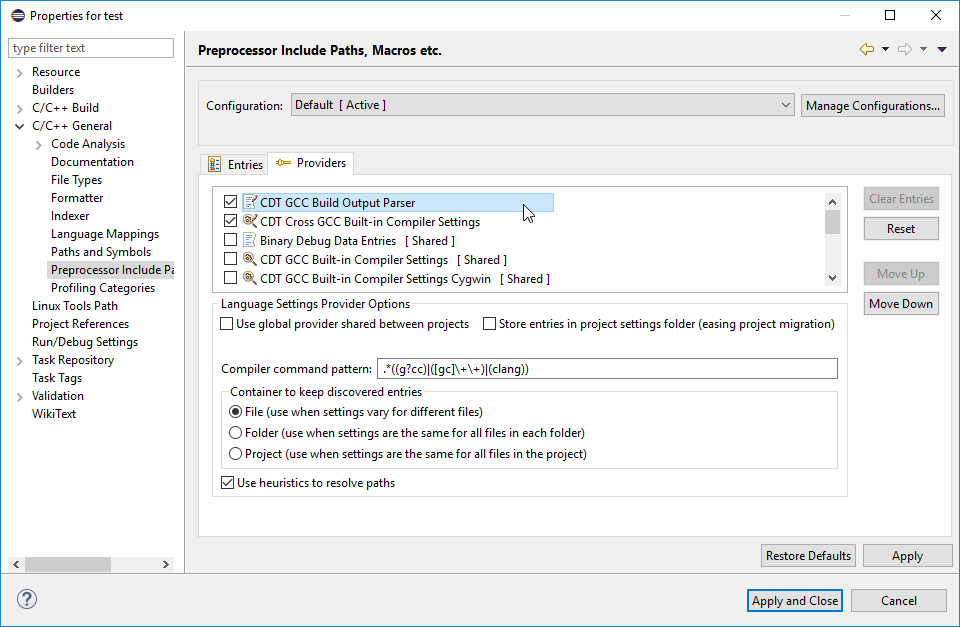
Now select CDT GCC Build Output Parser from the list. Add .*( before current contents of Compiler command pattern field and ) after them. If the initial contents were (g?cc)|([gc]\+\+)|(clang), the field will now contain .*((g?cc)|([gc]\+\+)|(clang)).
Verify indexer behaviour
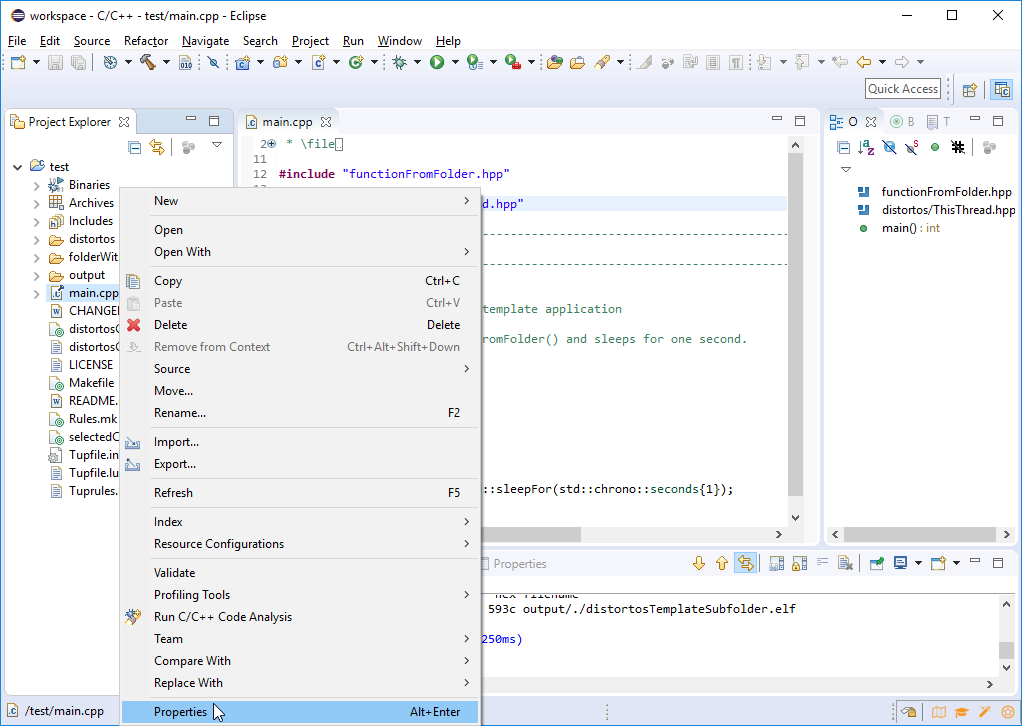
Click Apply and Close (OK in older versions of Eclipse) to close project preferences and rebuild the project again – Project > Clean… > OK, Project > Build All (or Ctrl + B). As Eclipse is now able to parse the compilation commands printed in Console tab, the icons of all compiled source files in Project Explorer panel will have a small wrench on them. You can inspect the values Eclipse has discovered by right-clicking such source file (for example main.cpp in the top-level folder of our project), selecting Properties, expanding C/C++ General group and selecting Preprocessor Include Paths, Macros etc. – the values will be listed under each provider which discovered them in the Setting Entries field.
And that’s it – at this point you have a fully functioning Eclipse project with distortos!